If you ask me about the best way to explore the United States, I won't hesitate to say a road trip. Road tripping is by far my favorite way to experience everything that America has to offer.
But, with the U.S. being such a huge country, deciding *where* to road trip can be tough.
There are tons of great road trip routes in the U.S. But my favorite part of the country for a short(er) road trip is definitely the American Southwest. Not only is the Southwest home to diverse landscapes and some of the coolest national parks in the country, but it's also fairly easy to reach and doesn't require a ton of driving to see a lot!
Hence why I'm spilling all my secrets and road trip tips in this Southwest itinerary!


When is the best time to take a Southwest road trip?
One question I've gotten pretty frequently since originally publishing this post is about when to take a Southwest road trip like this.
You can technically plan a version of this trip for any time of year. Most of the spots included here are open year-round, so it depends more on your schedule, and your tolerance for crowds and extreme temperatures.
Summer is usually the busiest time for travel in the US (especially at national parks), and it gets VERY HOT in this part of the country in July and August especially.

In winter, certain places in the Southwest at higher elevation DO get snow and experience colder temperatures (spots like Bryce Canyon and the Grand Canyon especially can get cold/snowy), but you definitely can visit the Southwest in winter!
But as far as the best time to go? I'd say the shoulder seasons are the best time for a Southwest road trip. April-May is good, as is September-October. You may run into some wet weather during these seasons, but the crowds will be thinner and you'll be able to fully enjoy everything in this itinerary.
This itinerary is written with an April-October trip in mind; outside of those months, some things may be closed or unavailable!
The perfect 10-day Southwest road trip itinerary
So here's my version of a “perfect” 10-day road trip itinerary for the American Southwest, based on several road trips I've personally taken through this region over the years, including basically this exact one with my husband Elliot one year in April.
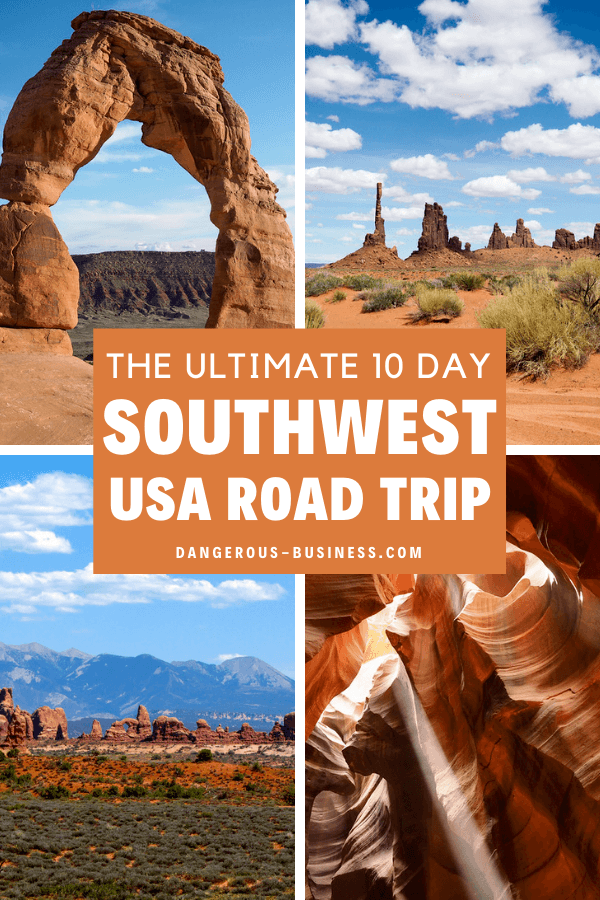
Highlights of this itinerary (which you can basically call a national park road trip) include:
- Valley of Fire State Park (Nevada)
- Zion National Park (Utah)
- Bryce Canyon National Park (Utah)
- Goblin Valley State Park (Utah)
- Capitol Reef National Park (Utah)
- Canyonlands National Park (Utah)
- Arches National Park (Utah)
- Monument Valley (Utah/Arizona)
- Sights in Page, Arizona
- Grand Canyon National Park (Arizona)
This itinerary covers roughly 1350 miles of driving.
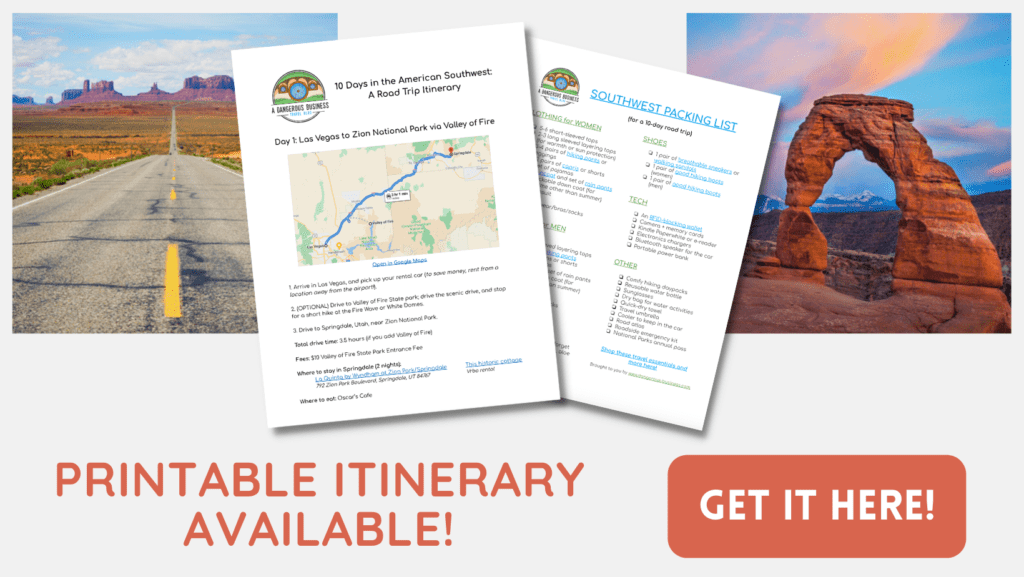
Get a printable version of this itinerary here!
Before we dive in here, it's important to note that this itinerary does include traversing through or near some indigenous lands in the Southwest. These include the Navajo Nation, the Hopi Reservation, and the Hualapai Indian Reservation. These people are both the historic and current stewards of these lands, and it's important to acknowledge and respect that when you travel here.
Day 1: Vegas to Zion via Valley of Fire
I suggest you begin and end your Southwest road trip in Las Vegas. You could also start in Salt Lake City, Utah, but I find that you can almost always find affordable flights to Vegas, no matter where you're coming from. So Vegas it is!
You'll likely land a Harry Reid International Airport in Vegas in the morning. (I recommend planning your trip this way to maximize your time! If you're going to get in late at night, you may want to plan at least one night in Vegas, and pick up your rental car on the morning you plan to start your road trip.)
You *can* pick up your rental car at the airport rental car center, but you can also pick up a car elsewhere in Vegas to save some money.
Need to rent a car for this road trip? There's no shortage of rental car options in Las Vegas. Keep in mind that you might be able to save money by picking up from a location that's NOT at the airport. I use Discover Cars to compare car rental prices in the US. Search for rental cars here.
And then it's time to get out of Vegas! If you've never been to Las Vegas before, you could definitely add on an extra day or two in order to fully experience it, but for now it's time to make for Utah.

The drive from Vegas to Zion National Park in Utah takes just about 2.5 hours.
You could make straight for Zion, or you could make a brief detour to Valley of Fire State Park. Valley of Fire is just off I-15 (which you'll be driving on anyway), and is an incredible park filled with red rock formations. Fun fact: It was Nevada's very first state park.
Even if you just have an hour or two, you can drive the epic White Domes Road and hike out to the Fire Wave – it makes for an excellent introduction to the Southwest.

RELATED: Visiting the Valley of Fire in One Day
Valley of Fire is an hour outside of Vegas, and Zion National Park is another 2 hours beyond that.
You could opt to stay in St. George (closer to Vegas) as a base for Zion, but I personally recommend the small town of Springdale, as it's much more central and better for entering the park early on Day 2.
If you skip Valley of Fire, you could visit Zion in the afternoon/early evening tonight. Or, do what we did and explore Springdale a bit before getting an early night to prep for hiking in Zion on Day 2!

Total driving time: 2.5-3.5 hours (3.5 if you opt to stop at Valley of Fire)
Fees: $15 Valley of Fire entry (for non-NV vehicles); $35 Zion entry by car, $20 Zion entry if you take a shuttle from Springdale (if you decide to visit today)
Where to stay: I love the La Quinta Inn & Suites at Zion Park/Springdale. The hotel has fantastic mountain views, comes with free breakfast (complete with fresh waffles!), and is just minutes away from a shuttle stop that will take you into Zion for free – which is great during busy times since you won't have to worry about the parking lot being full. (Read reviews in TripAdvisor | Book here)
Another good hotel option is Springhill Suites by Marriott, or you could book a cute cottage at Red Rock Inn Cottages.
If a vacation rental is more your speed, you could try this townhouse in Springdale (great for families), or this historic cottage.
Where to eat: We hit up Oscar's Cafe (within walking distance from our hotel) for delicious burritos.
Pro tip: You absolutely will want to get yourself a National Parks Pass for this trip. They cost $80 and are good for one year (you can buy them online, or at the first National Park site you visit). You'll save lots of money on this trip (potentially more than $100!) if you have one!
Day 2: Zion National Park
Wake up early to catch the free shuttle from Springdale into Zion National Park, the first of the Mighty 5 national parks you'll visit on this road trip. From March through early autumn, no private vehicles are allowed to use the Zion Canyon Scenic Drive, so you'll need to pick up another shuttle at the Visitors Center in order to head further into the park.
(If you're doing this trip in winter, then you might be able to drive your own car into Zion and through Zion Canyon. Check for shuttle info here.)
What you decide to do with your day in Zion really depends on your interests, the makeup of your group, and whether you're up for any intense hiking or not.

Zion is known for its rust-red mountains, winding canyons, and epic hikes. The most popular hikes in Zion are Angels Landing* and The Narrows, both intense hikes that should only be attempted if weather conditions are good. (The Rangers at the Visitors Center can let you know about incoming weather and trail closures.)
*Note that permits are now required to hike to the top of Angels Landing. You can apply for a hiking permit during four different seasonal lotteries, or in a day-before lottery. Permits cost $6, and likely will sell out. You will NOT be able to hike beyond Scout Lookout without a permit. Find more info on how to get an Angels Landing hiking permit here.
Elliot and I tackled Angels Landing early in the morning, which is a 5.4-mile hike that includes a 1500-foot elevation gain and half a mile of using anchored chains to pull yourself up along a narrow spine of rock.
It's NOT an easy hike, but is one of the most iconic in the Southwest – and we didn't regret doing it.

RELATED: I Hiked to Angels Landing and Didn't Die!
Angels Landing took us about 4 hours to complete, meaning we had time in the afternoon to ride the shuttle around the rest of the park and do a shorter hike (we chose the easy Lower Emerald Pool Trail that starts at Zion Lodge) before having a relaxing evening in Springdale.
If you decide to do The Narrows, that hike will take you just about all day.

If, on the other hand, you decide the strenuous hikes aren't really for you, check out the easy and moderate hikes on Zion's hiking guide. There are plenty to choose from that range anywhere from 30 minutes to 5 hours to complete, all with great Zion views.
Some not-as-difficult hikes within Zion Canyon include the Pa'rus Trail, Riverside Walk, and the Lower Emerald Pool Trail that I mentioned above.
You could also opt for a non-hiking activity in Zion like renting a bike, or just riding the shuttles to different view points in the park.
RELATED: 5 Things to Do in Zion National Park That Don't Involve Hiking

Total driving time: 0 hours (yay free shuttles!)
Fees: $35 Zion entry by car, $20 per person Zion entry if you take a shuttle from Springdale (if you didn't visit yesterday)
Where to stay: We once again stayed at La Quinta Inn & Suites at Zion Park/Springdale. I also think Springhill Suites by Marriott or a cute cottage at Red Rock Inn Cottages are good options here.
Where to eat: After a day of hiking, we rewarded ourselves with pizza at Zion Pizza & Noodle Co.
Day 3: Zion to Bryce Canyon
Head out of Zion on Day 3 via the Mount Carmel Highway (the stretch of Route 9 between Zion's entrance and Highway 89), which includes some great scenery and a 1.1-mile-long tunnel. Keep an eye out for bighorn sheep – but if you're going to pull over for photos, make sure you do it at designated pull-out spots!
If you want to fit in another epic (but much less-strenuous) hike, you'll be driving by the Canyon Overlook Trail. There's a very tiny parking area at the trailhead, but if you get an early start you should be able to park and do this mile-long hike.

The drive from Zion to Bryce Canyon National Park only takes about 1 hour and 20 minutes, meaning you'll have plenty of time for photo stops and no need to rush.
Once you get to Bryce Canyon, head straight into the park for some sightseeing! Bryce Canyon has some nice hiking trails, too, though it's better known for its 18 mile scenic drive and lookout points like Inspiration Point, Natural Bridge, and Rainbow Point.

I recommend driving all the way out to Rainbow Point first, and then working your way back to the park entrance, stopping at all the viewpoints along the way. When you get to Sunset Point, take the 1-mile rim trail to Sunrise Point for some of my favorite views.

Be aware, though, that Bryce is at a higher elevation – warm layers are a must! (Elliot and I visited in mid-April, and there was still some snow left over at some of the lookout points!)

Total driving time: 1.5 hours
Fees: $35 Bryce entry (or free with National Parks Pass)
Where to stay: There are very few options when it comes to hotels right near the entrance to Bryce Canyon National Park. We stayed at the Best Western PLUS Bryce Canyon Grand Hotel (Read reviews on TripAdvisor | Book here), though Ruby’s Inn right across the street is also popular.
Where to eat: We visited Bryce in April, which is still more or less off-season in this part of Utah. Because of that, many things were still closed for the winter. We ended up having dinner at Ruby's Inn (they have a decent buffet) and picking up some snacks at their general store since nothing else was open.
Day 4: Bryce to Moab via Goblin Valley
We took Day 3 off from hiking, but there's one hike definitely worth doing at Bryce Canyon: the Navajo Loop Trail. This trail will take you down into the canyon, right among all the orange hoodoos.

The hike starts at Sunset Point, and can be joined up with the Queen's Garden Tail to end at Sunrise Point.
We tackled this hike on a foggy, wet morning, and it took us about 2 hours to complete. It makes a great morning hike before you set off on the road again, though you could probably do it on Day 3, too, if you're not too sore after Zion.

RELATED: A Foggy, Soggy Morning of Hiking at Bryce Canyon
After the hike, it's time to pack up and head further east. Your destination for the night is Moab, Utah, but I recommend making a detour on the way to Goblin Valley State Park.
There are two ways to get from Bryce Canyon to Goblin Valley, but we opted to take Route 12, which takes you through Escalante and meets up with Route 24 so you can briefly drive through Capitol Reef National Park.
On the way, consider stopping for lunch at Kiva Koffeehouse, which is a super cool cafe within Escalante Grand Staircase National Monument (about 1.5 hours from Bryce). They serve up homemade soups, breads, and pastries, and also have a full espresso bar – a perfect lunch break amid some typical Utah scenery.

You *could* spend some time in Capitol Reef National Park, but we opted to go to Goblin Valley instead since it's a place far fewer people seem to know about.
Want to extend this road trip? Then and an extra night here so you can spend a day exploring Capitol Reef National Park, too! You can stay at the Capitol Reef Resort.
You'll get to Goblin Valley in the afternoon, and can spend an hour or so exploring The Valley of Goblins. This is a large area filled with short, squat hoodoos that have been dubbed “goblins.” Even through Bryce is also known for its hoodoos, the ones in Goblin Valley are entirely different.


From Goblin Valley, it's another hour and a half to Moab, where you can base yourself for the next couple of nights.
Total driving time: 5.5-6 hours
Fees: $20 Capitol Reef entry OR $20 Goblin Valley State Park entry
Where to stay: Elliot and I stayed in a cute apartment rental in Moab (like this one), but there are also plenty of hotels and motels in town (along with lots of restaurants) to choose from. Check out the La Quinta Inn and Suites Moab, or the Holiday Inn Express Moab.
Other cool vacation rentals in the area include this Adobe home with a hot tub and incredible views, and this 3-bedroom house that's right in the center of Moab.
Where to eat: Grab dinner at Moab Brewery, touted as the town's largest restaurant and only microbrewery. They have a bunch of beers to choose from (mostly ales and IPAs), and even brew their own root beer in-house.
Day 5: Canyonlands National Park
Canyonlands National Park tends to get overlooked by visitors to this part of Utah because Arches is also so close to Moab. But I firmly believe you should dedicate a full day to each park.

Canyonlands actually has two main sections of park – Island in the Sky and The Needles – which are about 60 miles apart. The Needles is more suited to hikers, so I recommend spending your day at Island in the Sky to mix in sightseeing with a little hiking.
This section of Canyonlands is only about 45 minutes from Moab.

Start out your morning with a visit to Mesa Arch. Many photographers will get here before sunrise in order to watch the arch be lit by the first orange glow of morning, but it's much less crowded if you visit slightly later in the day.

From there, drive to the viewpoints at Grand View Point and the Green River Overlook. Elliot and I also did the short hike out to Upheaval Dome, which is a nice option if you want to get your legs moving.

On your way back to Moab, be sure to stop at Dead Horse Point State Park, which offers up dramatic overlooks of the Colorado River and Canyonlands National Park. (Yes, it's an extra fee, but it really is worth it!)
Total driving time: 2-3 hours (including driving in the park)
Fees: $30 Canyonlands entry (if no National Parks Pass); $20 Dead Horse State park entry
Where to stay: Check out the La Quinta Inn and Suites Moab, or the Holiday Inn Express Moab for hotels. For vacation rentals, check out this cute cottage rental, this 3-bedroom house downtown, or this Adobe home.
Where to eat: We grabbed some delicious wood-fired brick oven pizza from Zax Restaurant & Watering Hole in Moab.
Day 6: Arches National Park
Located even closer to Moab (only 15 minutes from town), Arches National Park is really the star in this part of Utah. And for good reason: the park has more than 2,000 natural stone arches, along with pinnacles, cliffs, and balanced rocks all in a brilliant orange-red hue.

If you've never been before, you'll definitely want to dedicate a full day to this park.*
*Note that Arches National Park now requires timed park entry by reservation in order to help alleviate congestion in the park between 7 a.m. and 4 p.m. You'll need to reserve a timed entry slot from April 1-October 31. Reservations cost $2 and are being released in 30-day increments 3 months in advance. Learn more and reserve your entry time here.
Once you have your entry time, I would spend the first part of your day driving the 18-mile-long scenic road through the park, stopping off at some of the viewpoints and shorter walks out to the arches. Park Avenue, Balanced Rock, the Windows Section, and Double Arch would be my top picks.

Elliot and I left the park and went back into town for lunch and got take-away sandwiches for a picnic dinner, and this is still be possible even with the timed entry system (currently you need to enter the park for the first time during your designated time slot, but can then exit and re-enter the park throughout the day if you want).
You could also pack lunch and dinner and just stay inside the park the whole day – just remember to pack plenty of water, too!
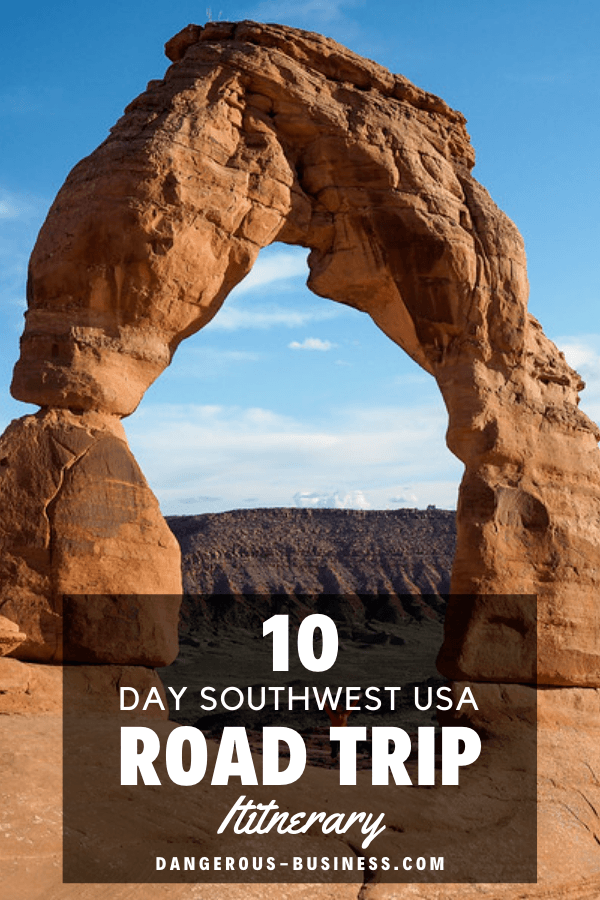
I recommend ending your day at Arches with the most iconic hike in the park: the hike to Delicate Arch, the most famous arch in the park and the symbol of the state of Utah. Most people tackle this hike at sunset, when the setting sun paints the 65-foot arch an incredible rusty orange color.

The hike is tough going up, so allow yourself 1-1.5 hours to reach the arch in time for sunset. We got there about an hour early and enjoyed a little picnic as we watched the sun go down.

RELATED: Iconic Utah: A Sunset Hike to Delicate Arch
Total driving time: Maybe 2-3 hours (including driving in the park)
Fees: $30 Arches entry (or free with National Parks Pass)
Where to stay: Again, Elliot and I stayed in a cute apartment rental in Moab (like this one), but there are also plenty of hotels and motels in town (along with lots of restaurants) to choose from. Check out the La Quinta Inn and Suites Moab, or the Holiday Inn Express Moab.
Other cool vacation rentals in the area include this Adobe home with a hot tub and incredible views, and this 3-bedroom house that's right in the center of Moab.
Where to eat: We got our picnic sandwiches from Sweet Cravings Bakery & Bistro.
Day 7: Moab to Page, AZ via Monument Valley
After nearly a week of exploring Utah's national parks, it's time to wave goodbye on Day 7. Today you'll be crossing over into Arizona – but the great scenery will only continue!
Your destination today will be the town of Page, Arizona, but I would be a terrible travel blogger and awful Southwest superfan if I didn't insist that you stop at Monument Valley along the way.

Located on the Utah/Arizona border, Tsé Biiʼ Ndzisgaii (Monument Valley) is a Diné (Navajo) Tribal Park renowned for its towering sandstone buttes. You may even recognize it from old Western movies, since it was a favorite filming location for directors like John Ford.

Monument Valley is a 2.5-hour drive from Moab, and I recommend booking a guided tour of the valley. There's a 17-mile loop road that can be driven in your private vehicle, but to truly appreciate this site, you need to get into the backcountry – and you can only do this on a tour.
If you arrive a bit early, you can take in the views from The View hotel before meeting up with your tour guide.

RELATED: Monument Valley: A Must-Visit in the Southwest

If you're looking for good tour options, here are a couple you can book online in advance:
- 2.5 Hour Guided Tour of Monument Valley
- 3.5 Hour Monument Valley Tour
- Sunrise Tour of Monument Valley
- Sunset Tour of Monument Valley
A Monument Valley backcountry tour is, in my opinion, the ONLY way to truly appreciate this place (and to pay respect to its Diné stewards, since most of the tour companies here are Navajo-owned).
After your tour is over, you can drive the remaining two hours to Page to arrive just around dinnertime.
Total driving time: 4.5 hours
Fees: $20 Monument Valley entry; $75-$85 Monument Valley tour
Where to stay: I recommend the Best Western View of Lake Powell Hotel in Page, which has a really cool view from the pool. The Days Inn & Suites Page Lake Powell and Holiday Inn Express & Suites Page – Lake Powell Area are also highly rated – but note that hotels in Page sell out extremely quickly during the high season, so this is one place where you definitely want to book as far in advance as possible.
Where to eat: Definitely go get yourself a sampler plate at Big John's Texas BBQ in Page!
Day 8: Page, Arizona
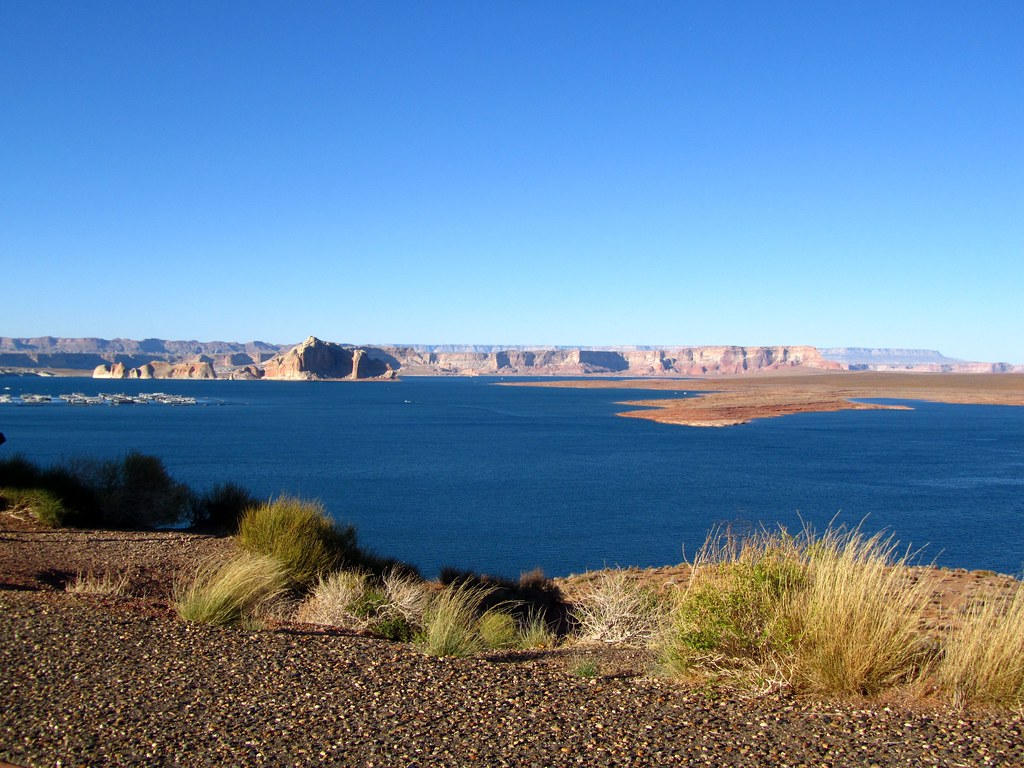
Page is a tiny little town that packs a big punch. Not only is it near Lake Powell and the Glen Canyon National Recreation Area, but it's also just a short drive from Horseshoe Bend and Antelope Canyon.
Start your morning off with a visit to Horseshoe Bend. It's just a 10- or 15-minute drive from your hotel, and is one of the most Instagrammable places you're likely to visit in the Southwest.
A short hike will take you from the parking area to an overlook 1,100 feet above where the Colorado River makes a massive bend through a deep canyon.

The hike to the lookout isn't long (only about 3/4 of a mile), but it's almost entirely sand, so keep that in mind when you're planning your time AND your footwear.

(Note that the above photos were taken at Horseshoe Bend before the new viewing platform was built; I did not hop any fences or barriers to take these photos, because those things didn't exist at this site until fairly recently.)
Before lunchtime, I recommend booking a tour out to Upper Antelope Canyon. Antelope Canyon actually has two sections (Upper and Lower), but it's the Upper canyon that has the famous light beams that you see in all the photos.

Because these canyons are located within the Navajo Nation, you can ONLY visit Antelope Canyon as part of a guided tour. Tours of the Upper canyon during prime light-beam-viewing hours (usually 11 a.m. – 1 p.m.) sell out quickly and can be crowded, even when you're visiting in shoulder season. (Elliot and I went in April, and all the photography tours and most of the midday tours were sold out weeks before we even left.)
So book far in advance if you really want to visit Upper Antelope Canyon. (There are several local companies to choose from, and they all run very similar tours.)

RELATED: Is Antelope Canyon Really Worth Visiting?
Spoiler alert: I DO think Antelope Canyon is worth seeing, but just be aware that you'll be sharing the experience with a lot of other people.
(If the Upper Antelope Canyon tours are sold out, you can still visit other slot canyons in the area like Lower Antelope Canyon, Canyon X, and Cathedral Canyon.)

Antelope Canyon tours to check out:
- Lower Antelope Canyon Ticket
- Upper Antelope Canyon Ticket
- Half Day Tour of Upper and Lower Antelope Canyon from Page
- Antelope Canyon X Admission Ticket
In the evening (or in the afternoon if you decide to skip Antelope Canyon), you could consider booking a sunset cruise on nearby Lake Powell, or maybe rent a kayak or standup paddleboard.
(Just note that if you go to Lake Powell, you'll have to pay an entrance fee into the Glen Canyon National Recreation Area, too.)
Total driving time: 1-2 hours
Fees: $10 for parking at Horseshoe Bend; $85+ for an Antelope Canyon tour; $30 Glen Canyon entry; $45+ for a Lake Powell cruise
Where to stay: The Days Inn & Suites Page Lake Powell, Holiday Inn Express & Suites Page – Lake Powell Area, and Best Western View of Lake Powell Hotel are all good bets if you want a hotel.
Where to eat: We had yummy Mexican food at El Tapatio, and good burgers at Slackers.
Day 9: The Grand Canyon
When my sister and I did a Southwest road trip in the summer of 2011, we visited the North Rim of the Grand Canyon from Page. It's a much quieter experience (only 10% of visitors to the Grand Canyon visit the North Rim), but still just as epic.

However, when Elliot and I did our road trip in April, visiting the North Rim wasn't an option since the only road leading to this part of the Grand Canyon closes for the winter and is only open from mid-May through mid-October. For that reason, we decided to spend a day at the South Rim instead.
(And if you want to visit both the North Rim and South Rim of the Grand Canyon, I recommend adding an extra night in here; otherwise it's just too much driving in one day!)
It's actually quicker to reach the South Rim entrance to Grand Canyon National Park from Page than it is to reach the North Rim, so it worked out well for us, timing-wise.
Start out at Desert View at the east entrance to the Grand Canyon, and make your way along Route 64, stopping at all the viewpoints on the way to Grand Canyon Village and the South Rim visitor center.


After checking out the visitor center and nearby Mather Point, you can hop on one of the free park shuttles that travel along the South Rim throughout high season at the Grand Canyon. These shuttles are a great stress-free way to access trails, viewpoints, and other points of interest, some of which are only accessible by bus.

You can hop on and off the Red Route bus all afternoon, visiting amazing lookouts like Maricopa Point, Mohave Point, The Abyss, Pima Point, and more. You can even do a short hike between two of the shuttle stops along the Rim Trail.

If you want to catch a great sunset at the South Rim of the Grand Canyon, Hopi Point is the most famous spot, but you can find great views at Yaki, Pima, and Yavapai Points, too.


We then decided to drive to Flagstaff for the night in order to save some money on a hotel (it's NOT cheap to stay anywhere near the Grand Canyon during most of the year).
If you book far enough ahead, though (or if you're traveling in the off-season), you can find a hotel room in the small town of Tusayan, which is just outside the South Entrance. (On my third trip to the Grand Canyon, this is where I stayed, and it's very convenient to the park!)
Total driving time: 4 hours
Fees: $35 Grand Canyon entry (or free with National Parks Pass)
Where to stay: We stayed at the Sleep Inn in Flagstaff simply because it was affordable and convenient. If you book far enough in advance, I can also recommend the Best Western Premier Grand Canyon Squire Inn in Tusayan, which has fun things like a bowling alley on-site and is closer to the park.
Day 10: Drive back to Las Vegas
Day 10 is when our Southwest adventure came to an end. The drive from Flagstaff back to Las Vegas is just under 4 hours, meaning you can easily book your flight home in the afternoon/early evening, which is what we did.
If you're not planning to leave tonight, you might want to add on a stop at the Hoover Dam on your way back.
On your way back into Las Vegas, you can also stop to see the roadside art attraction called Seven Magic Mountains, just off I-15. It's a free, quick photo stop.

Total driving time: 4 hours
BONUS: Sedona, Arizona
If you have an extra day or two, consider adding in a stop in Sedona, Arizona, after you visit the Grand Canyon. It's less than an hour south of Flagstaff and is a super cool town in red rock country.
My sister and I spent two nights in Sedona on our cross-country road trip, and we both loved it. (And I've since been back in the winter, too, and it's just as great!)

Some things to do in Sedona (especially if you visit during the warm summer months) include: taking a Sedona Trolley tour, getting out into the red rocks on a Jeep tour, splashing around at Slide Rock State Park, visiting a vortex, and possibly hiking in Red Rocks State Park.
In the winter, you can still do some hikes, driving tours, and spend time shopping around Sedona (I really like the Tlaquepaque Arts & Crafts Village).

Fees: $20-$30 for trolley tour; $20-$30 per car Slide Rock entry; $7 per person Red Rocks entry
Where to stay: Check out the Arabella Hotel (mid-range), or the Amara Resort & Spa (luxury). For rentals, this home with a courtyard and hot tub is great.
Where to eat: Get a sandwich at Sedona Memories Bakery Cafe, or try some cactus fries at the Cowboy Club Grille. The Elote Cafe is also highly recommended.
Don't forget that you can get a printable version of this itinerary!
Southwest road trip tips
Check out my list of road trip tips for ALL my tricks for road tripping in the U.S.
But here are the tips that are most important for this trip in the Southwest:
- Buy a National Parks Pass. If you noticed, this road trip itinerary has you visiting 5 or 6 national parks, all of which charge a per-car entrance fee. You can save some money by getting a National Parks Pass either before you leave or when you arrive at Zion. The pass costs $80, and then is good for an entire year at any NPS-managed site. It's a great deal, and will save you quite a bit on this road trip alone.
- Make sure you have extra water. Dehydration is not a joke, and can be a very real threat if you’re traveling out West during the summer. Always have extra water (pack a cooler or large water jug in your trunk!), because you never know when you might need it. Most national parks will have water bottle filling stations, but be sure to have a reusable water bottle (I love my Camelbak Chute) or a hydration pack with you – and fill up at every opportunity.
- Allow extra time. I've estimated driving times, but it's always best to assume drives will take you longer than Google Maps suggests. Photo stops, bathroom stops, and detours to check out random things will add more time to any drive!

What to pack for a Southwest road trip
Some of this depends on what time of year you go; the Southwest can get extremely hot in the summer, and quite cold in the winter. But in general, here are some of my must-haves for this sort of road trip:
- Lightweight clothing you can layer (I'm a big fan of Unbound Merino these days!)
- Good hiking boots (I like my Merrell Moabs, which are named after a place on this itinerary!)
- A raincoat – ladies, go for the Columbia Arcadia II
- A reusable water bottle
- Sunscreen and a good sun hat
- A road atlas
- A cooler to keep in your car
- A roadside emergency kit, because there are long empty stretches on this road trip itinerary!
For more road trip packing recommendations, head over to this post: USA Road Trip Essentials: What to Pack for a US Road Trip
READ NEXT: 25 Things to Do in the Southwest USA to Put on Your Bucket List
Have you ever road tripped in the American Southwest? What are your favorite stops?
Pin it for later:

Amanda Williams is the award-winning blogger behind A Dangerous Business Travel Blog. She has traveled to more than 60 countries on 6 continents from her home base in Ohio, specializing in experiential and thoughtful travel through the US, Europe, and rest of the world. Amanda only shares tips based on her personal experiences and places she's actually traveled!


Headed here in a few days – took a lot from this itinerary. Can’t wait! Thank you!
If you can start in May, then along with a visit to the North Rim of the Grand Canyon, you should also visit another Utah State Park and a couple of National Monuments. The Coral Pink Sand Dunes are a short detour off of US Highway 89 between Mt Carmel Junction and Kanab. Large (50 – 100 foot) sand dunes made of Coral Pink sand. The other two National Monuments to sneak in, are Pipe Springs National Monument between Fredonia, AZ and Hurricane, UT. The other is Cedar Breaks National Monument. Also, another area of Zion that most miss is the North (Kolob) section that is only accessible from I-15 near Ft. Hamblin just south of Cedar City, UT. (While at Cedar City, don’t miss the Utah Shakesperean Festival, one of the top 10 in the World. Basically, 10 days isn’t enough. 15 barely covers it.
10 days is never enough, but it’s often all people have (if they’re lucky!). Thanks for the extra suggestions – I agree the Kolob section of Zion is great, but it takes some extra time to get to!
Fantastic post! What is the estimated total spend per person for this 10 day road trip? I know it varies but just to have an idea of the budget I would need to prepare. Thanks!
It definitely depends on so many factors, including whether you’re renting a car, what hotels you book, what time of year you’re traveling, and whether you’re eating out for every meal or not. I did not closely track my own budget for this one, unfortunately. I think if you estimate that you’re going to spend at least $200-$300 per day when you factor in accommodation, car, gas, and food, that’s probably a good starting point – but you can very easily spend more since hotels near national parks can be very pricey, and rental car prices in the US have been ridiculous lately.
Hey there,
We are taking this southwest trip on June 10-19. I have heard from others that we need to sign up for passes ahead of time for parks to access the parks. I did get the annual pass you suggested but are there other passes that I should get ahead of time. I just want to be sure I have everything done in advance so that we can do all of these fun events.
Jenn
Hey Jenn! If you read this post closely, I do point out which things you want to book in advance! For example, Arches National Park now has a mandatory reservation system, so you will indeed need to reserve a time to visit that park. (It’s the only national park on this itinerary where you need a reservation to enter, though.)
Great post Amanda. I just did a very similar trip on a motorcycle with about 18 other bikes. We started in Grand Junction, Co went to Moab 2 days then to Hanksville, Bryce Canyon, Springdale ( a few of us went via Hoover Dam, Las Vegas) then on to Marble Canyon, Bluff UT, Ouray then back to Grand Junction. I flew into Denver a few days early and took the Amtrak California Zephyr from Denver to Grand Junction, what a fantastic day trip that was ! I’m looking forward to going back and do some of the things I couldn’t get to this time. While in Moab, we went to Dead Horse Point to watch the sunrise, there was no one else there other than my 3 buddies and I.
hello Amanda,
Fabulous post ! May I ask if you think it is ok to rent a motorhome/camper van for this trip ? is parking a hassle?
thanks
You’ll see a lot of RVs out in the Southwest, so it’s definitely feasible! I’ve not personally done an RV trip though, so I can’t speak to how easy/difficult it is to find parking. But I imagine you’d be fine, especially if you get a smaller RV or van!
Hello Amanda!
Thank you for this detailed travelogue! Since you were potentially traveling through some rough terrain, did you rent a high clearance or 4×4 SUV? Or did you feel it wasn’t necessary?
I’ve done everything in this itinerary (some of them more than once) in various normal-sized cars! You definitely don’t need a high-clearance vehicle – though I might recommend an AWD/4WD car in the winter months.
We are planning to take one trip out west. We have 13, 11, and a 9 year old. Would you recommend the Southwest or Northwest. We really have about 10 days available. I initially was thinking your southwest road trip but my husband wondered if the Northwest would be better. Neither my husband or I have been to either. We are planning to go the beginning of June. Thanks so much for your help:0
Jenn
Great question! Both regions are great for road trips, so it probably depends on what sort of scenery you’re interested in seeing. The Southwest is all the red rocks and canyons and arches, while the northwest (assuming you’re talking Washington/Oregon) has more forests and mountains. The Northwest would probably have milder temperatures in June, if that’s any concern.